Sunday, October 30, 2011

after a year


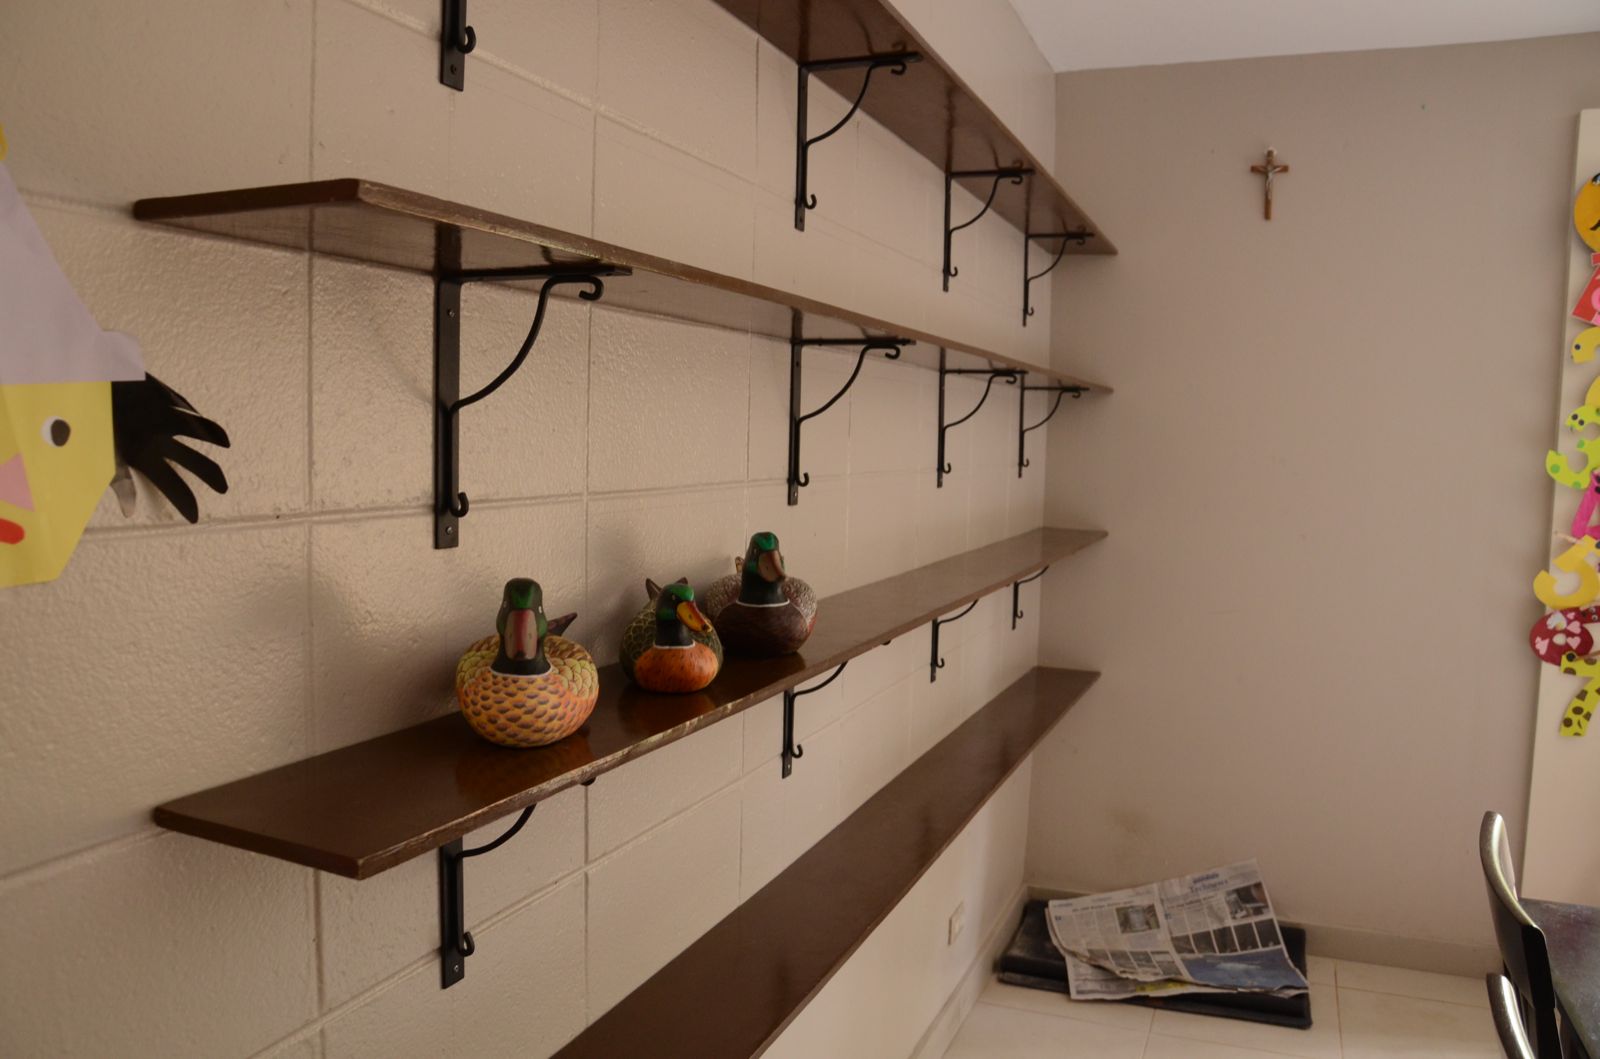
The ducks are finally out! Ha!
Actually I was talking about those gorgeous shelves, supposedly my Christmas present last year.
Not that the delay bother me over much. The point is that it's finally here, no?
And it's beautiful!

The shelves extend almost the whole length of the dining room. I am hoping that they would finally remove the (ever-present) clutter from the dining table: the various arts & crafts material, half read books, and whatever knicks knacks that found its way to the table.

At the same time, we are also hoping to relieve the overcrowding over at the ugly ahem, bookshelf.


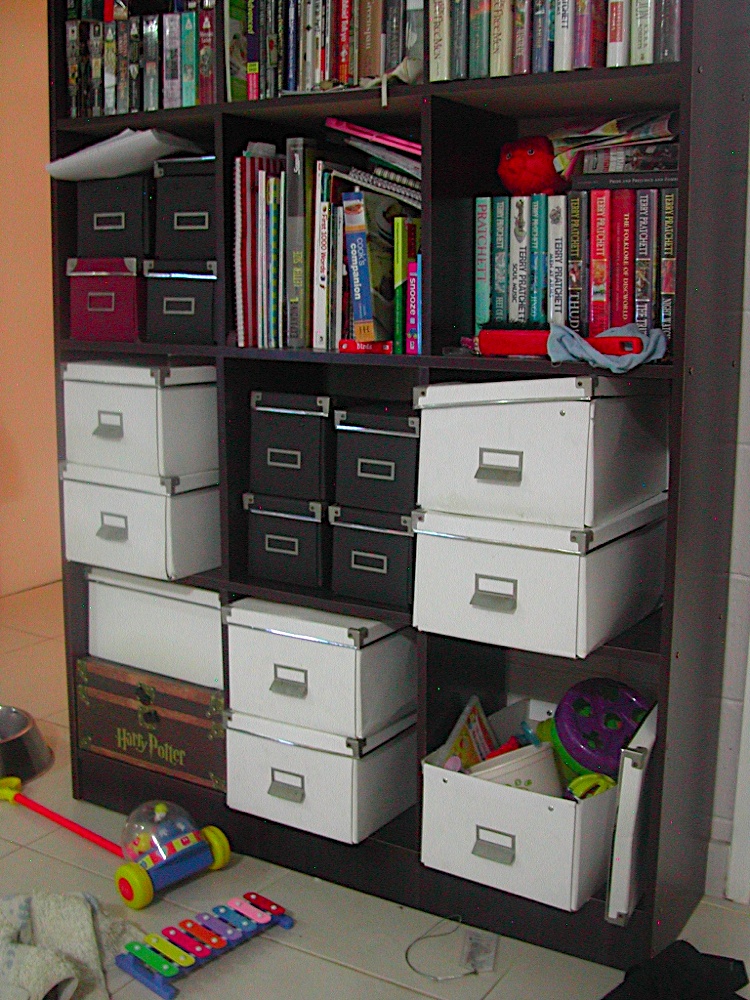
We bought the old shelves from a local store and the Mister assembled them himself. My complains regarding that particular shelf, however, ranged from the sheer poor workmanship, bad quality material, wobbliness, to simple plain ugly.
Especially as compared to our old shelves in our old apartment:


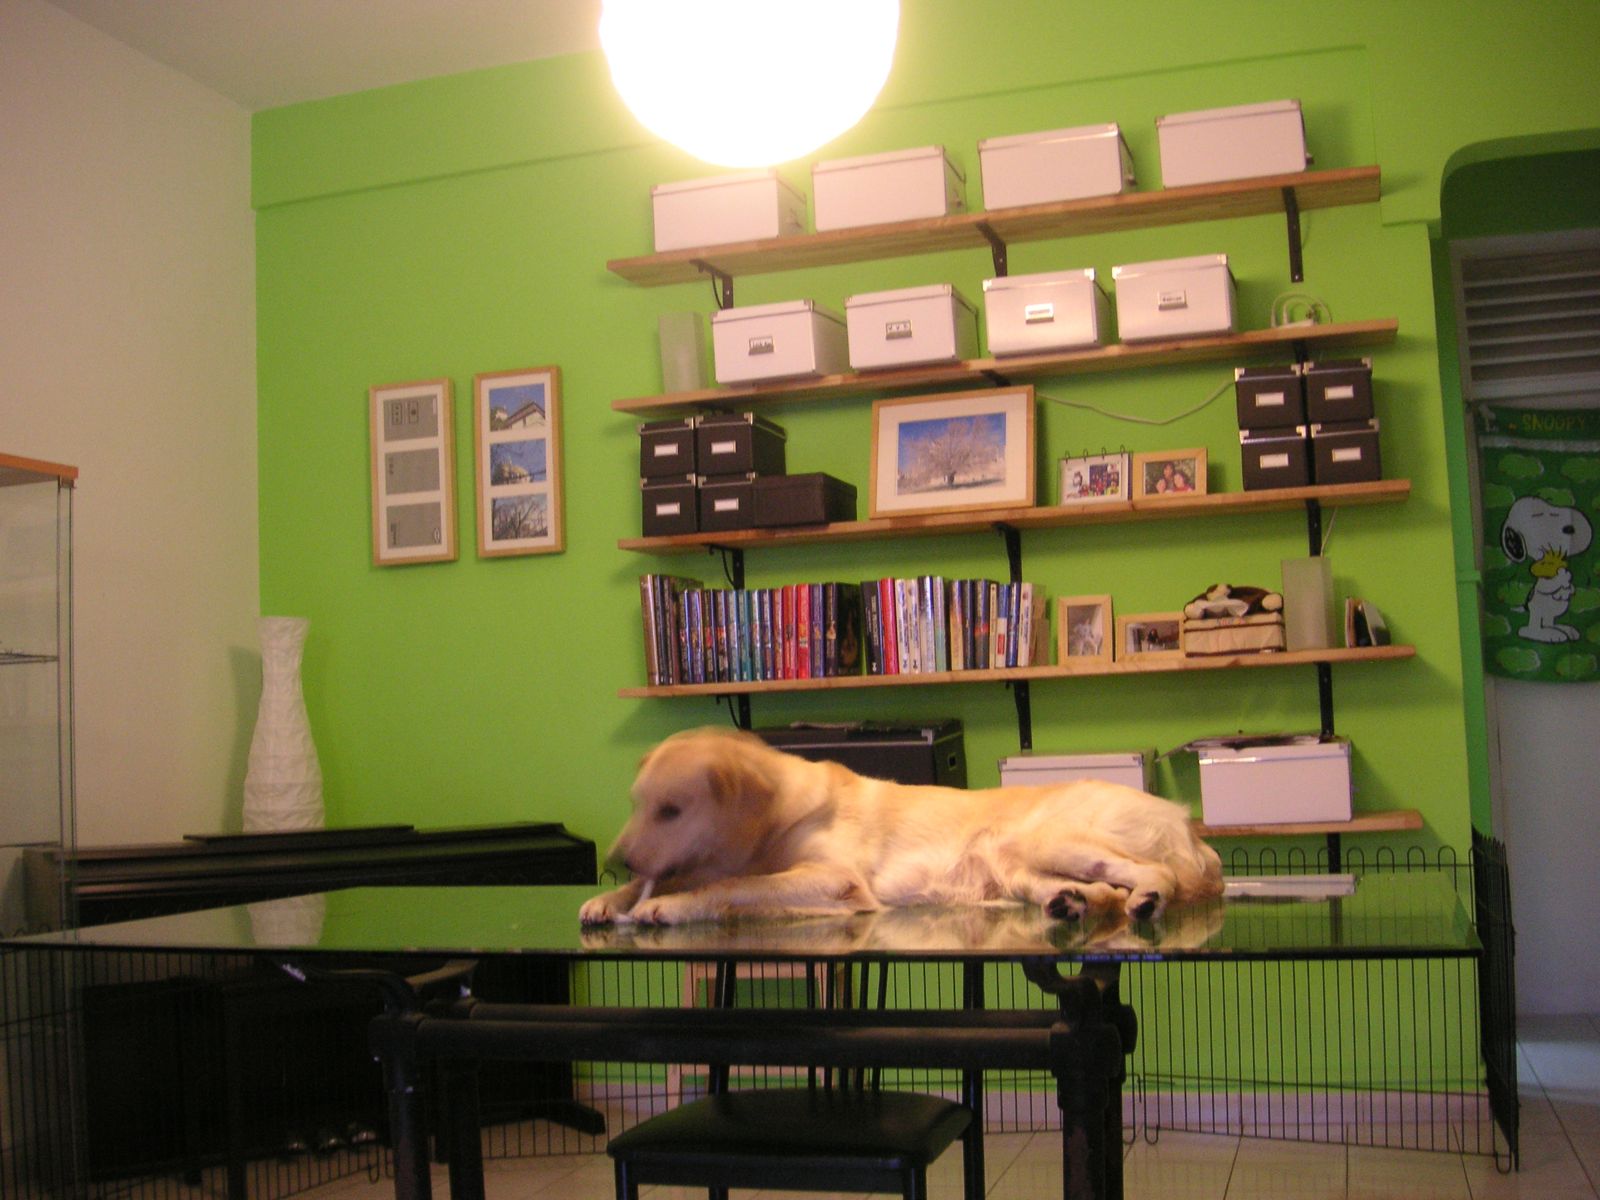
Mmm... Yes, our old apartment was full of Ikea stuff. The consequences of living barely 15 minutes away from an Ikea store, I suppose.
In any case, both the shelves and the brackets were on sale that day, so we bought them and my handy Mister installed it and it made for a fantastic focal wall.

Much to our regret, we did not have enough presence of mind to actually take off those shelves and brought it with us across the sea. If you ever try to find decent furniture at reasonable prices around here you'll understand our regret.
In any case, we settled with buying the very same bracket from Ikea on our trip to Hongkong. For the shelves, however, we settled with locally sourced wood planks, which the Mister then had to sand, prime and paint himself.


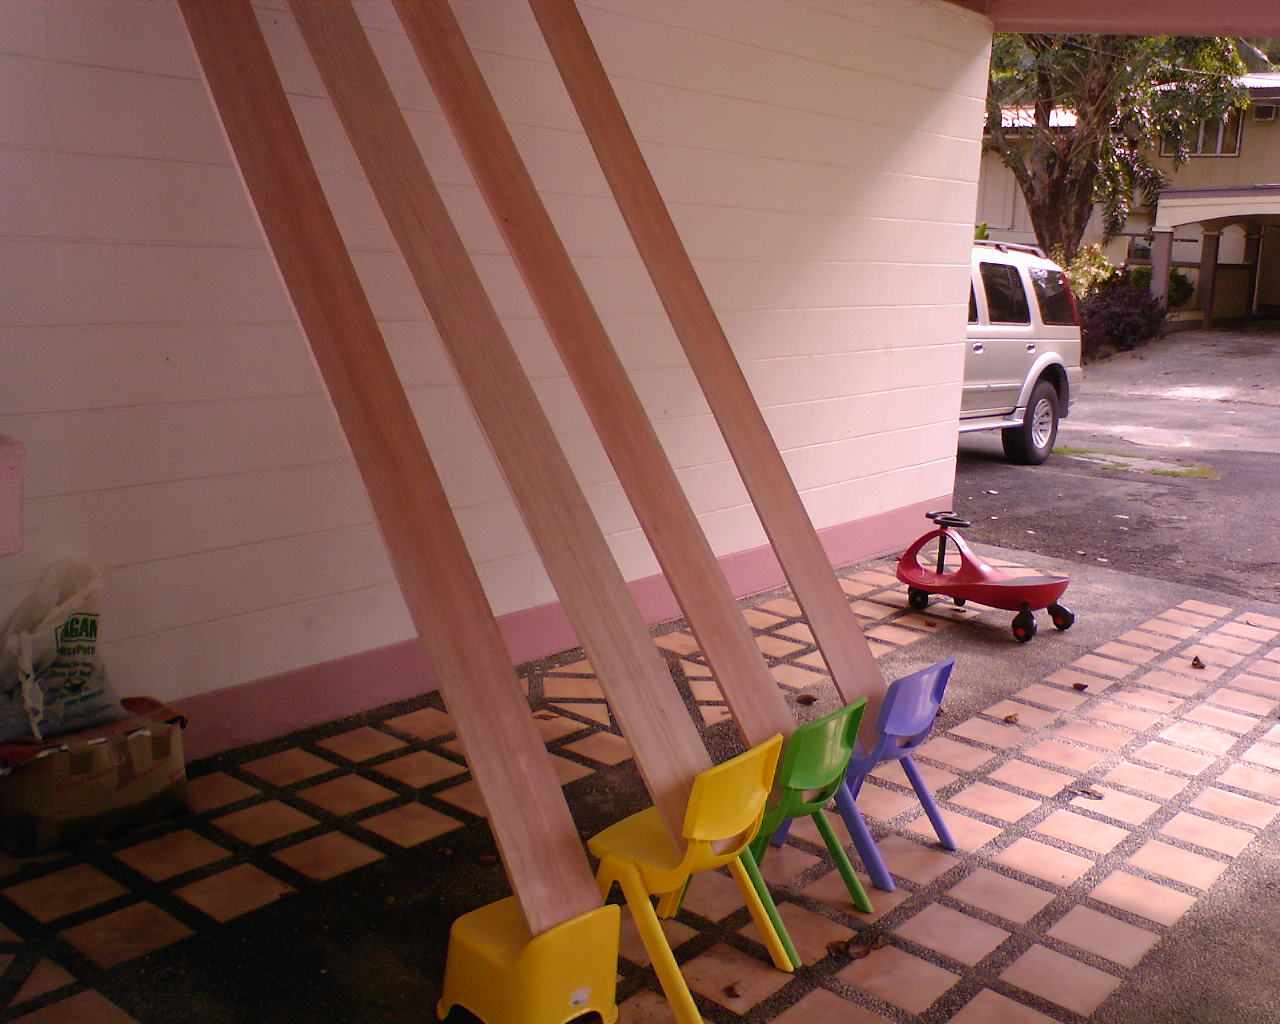
T'was a long process spanning many days in which layers of primer and stain dry off before getting layered again the following day.


At the end of the whole painting process, I guess we got a bit tired, so it took a while before we continued to the next step, which was to prepare the wall for the shelves. After painstakingly marking the wall, the Mister found out that his drill couldn't handle the thick wall. Ugh. And so the shelves and the brackets stood in the storage for many months before we 'remembered' to ask the rental office to do the job for us. Duh!
For some reasons, we never thought of that before!

In any case, the carpenter appeared yesterday with his Makita drill (!), and finally finished the job after just a few hours.


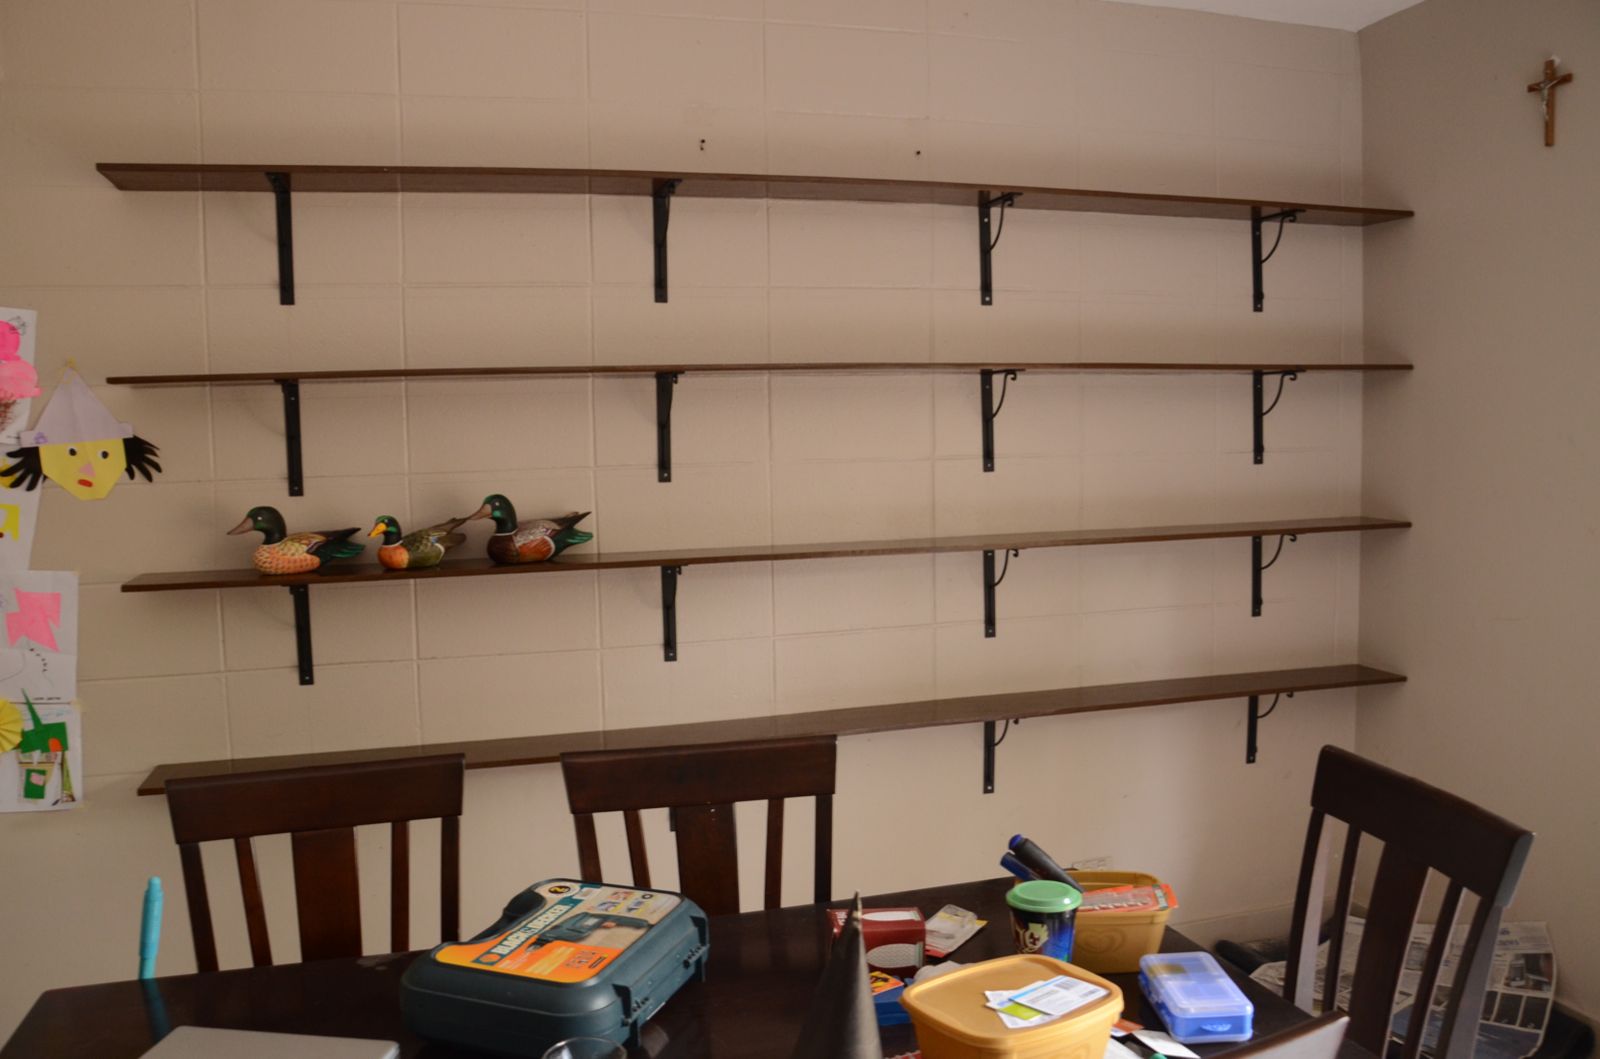
For today we are just cleaning up while we take stock of our stuff: which one to stay, which one to move to the new shelves and the likes. The dining room already feels different with the addition of the shelves, and hopefully the dining table would get to see more use apart from repository of stray items in the house.
More pics later once we fill up the shelves. Until then!

Out of curiosity, do you prefer standing shelves (which can be used as room divider too, by the way) or wall shelves? Standing shelves require less work, most definitely, yet I love the wall shelves as they just create a focal wall in the house. What do you think?

Monday, October 24, 2011

when the sun is up


When the storms and rains finally left
When the sun came back to its usual heat and brightness
When the blue skies return with the wisps of fluffy clouds
It it no longer the time to hunker down in the house and watch the season pass you by
And so we went out to embrace the weather, hot as it was
To enjoy, to appreciate, to explore
And sometimes, to rejoice in a long, almost forgotten activity ...


It's back to summer here in the two seasoned corner of the world!
Go out and enjoy!

Monday, October 17, 2011

Overthinking


Sometimes it's good to really stop, sit down, and think about what you are going to do.


But if you sit too long, someone might just jump ahead of you and do it first.

Lesson from the monkeys: Don't overthink it!

Sunday, October 16, 2011

Yet another spider


Ah yes, I think I am slightly over-obsessed with these spiders. But there are so many of them around here! We kept finding new ones every time we went out for our walkies, and this one happen to build its web so conveniently that I manage to get a full frontal shot.
The web had since been destroyed, not sure by human or sheer force of nature (read: storm?).
I haven't found the new residence yet, but I would still like to use this fellow there to remind you all:

Halloween is coming!

Oh I have some preparations to make.

For all the arachnophobes out there, sorry. But I do happen to think that this fellow up there totally gorgeous, and so appropriate for Halloween with its skull-like head. Of course, should it make a residence somewhere near MY house, I would sure be out armed with the broom to 'convince' it to make it's residence somewhere else.
After taking a few gorgeous pics, that is.

Thursday, October 6, 2011

Thank you

For being a source of inspiration
For providing many a great tools for so many
For finally getting an important family member into today's technology
For many things

Thank you

Rest in peace knowing that you have achieved many things that you had set up to do

Sunday, October 2, 2011

Blogger Tutorial: How to change your favicon

I have finally decided that those little icons had mocked me long enough.
It may have to do with the fact that I use Firefox as my browser, which shows those pesky icons on both the tab and the address bar. In comparison, Safari only shows those icons at the address bar.
Still, since I am more used to Firefox...

The itch might have started with noticing other blogs, especially Blogger-based blogs (with the telltale navigation bar), having their own favicon instead of the Blogger favicon.
There are many tutorials as well as favicon generator out there, but I previously put the idea aside while waiting for an inspiration for a logo of my own.

Until the itch became unbearable.

I should probably also talk about how I made my own 'logo' but we'll cover that in a different  post, if ever. It's a bit long, and I just found out I don't really fancy long posts. So!


  1. To start with, you need to have the proper image, a square image. The Wikipedia entry on favicon stated 16x16 pixels. Since the end result is pretty miniscule, no need for high definition, high resolution image. Blogger actually prefers that the image should not exceed 100kb!
  2. When you go to the Blogger Dashboard, choose your blog, and go to the layout. You'll see something similar to the image above. Click on the 'Edit' link (shown near the red arrow). You'll get to dialog box asking for the file from your computer.
  3. Choose your square image file. Click the 'Save' button.
  4. THAT'S IT!
If you image fulfills Blogger's requirement (it's square in dimension and less than 100kb), you'll see the favicon image changed immediately in the Blogger layout.
Your browser might take a bit longer to change. When I finally succeeded, it took about 1 day for the change to take effect on my browser.

The other thing to note is your image format. Most tutorials/references I read recommends .ico format for the image file. 
I used plain .png format.
It worked for me because I only use Safari and Firefox. 
If you use IE .... haha.. tough luck. You need to use .ico.

As mentioned before, there are favicon generators available on the net that will help you to create (and some even host!) your ico file.
However, I did not manage to use those successfully as somehow Blogger rejected the resulting image as not square
Don't ask. I have no idea.

Maybe I'll try again someday in the future (and implement an ico file for the sake of those IE users out there). But in the meantime, I shall bask in my own success in managing to change the favicon of my personal/family blog.

Siiiiggghhhh..... *contentedly admiring my own handywork.